Removing a glass screen protector from your device might seem straightforward, but doing it improperly can damage your screen or leave sticky residue. This guide will walk you through the safe removal process, ensuring you take off the protector without any hassle or damage. We’ll cover everything from assessing the condition of the protector to the actual removal techniques and cleaning up afterward.
Assessing the Condition of Your Screen Protector
Determining When to Remove the Protector
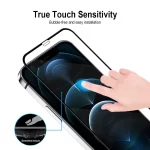
Before you start the removal process, it’s important to evaluate why you need to take off the glass screen protector. Common reasons include a cracked or damaged protector, wanting to upgrade to a new protector, or noticing decreased touch sensitivity. If the protector is cracked, it’s advisable to replace it to avoid any potential damage to your device’s screen. On the other hand, if the protector is still intact but you want a new one, carefully removing the old protector will help you apply a new one seamlessly.
Checking for Any Damage
Inspect the screen protector for any signs of damage. Look for cracks, chips, or significant scratches. If the protector is heavily damaged, it might be more challenging to remove and could leave behind small shards of glass. In such cases, proceed with extra caution. If the protector is in good condition but you’re still planning to replace it, the removal process will be smoother. Ensure that your device’s screen is also free from dirt or debris before starting the removal.
Gathering the Right Tools
Essential Tools for Removal
To safely remove a glass screen protector, gather the necessary tools to make the process easier and safer. You will need a plastic or silicone card (like a credit card), some adhesive tape, and a pair of tweezers or a small tool for prying. Avoid using metal tools as they can scratch the screen or damage the device. Additionally, having a microfiber cloth and some cleaning solution on hand can help with post-removal cleaning. These tools ensure that you can handle the protector carefully and avoid any accidental damage to your screen.
Preparing Your Workspace
Set up a clean, well-lit workspace to perform the removal. A clutter-free area reduces the risk of accidentally dropping or losing small parts of the protector. It’s best to work on a flat surface to maintain control and precision during the removal process. Make sure your hands are clean and dry to avoid transferring any oils or dirt to your device’s screen. Preparing your workspace helps in carrying out the task efficiently and ensures that you can handle the glass screen protector carefully.
Removing the Glass Screen Protector
Gently Lifting the Edges
Start by carefully lifting the edges of the glass screen protector. Use a plastic card or your fingernail to gently pry the edges away from the screen. Begin at a corner or edge where the protector might already have some lift. Be gentle to avoid cracking the protector further or damaging the screen underneath. The goal is to create a small gap between the protector and the screen to make it easier to remove the entire piece.
Using Adhesive Tape to Assist
If the edges are difficult to lift, use a piece of adhesive tape to help. Place a small piece of tape on the edge of the protector and gently pull it upward. The tape can provide extra leverage and help in lifting the protector without causing damage. This method is particularly useful if the protector is firmly attached or if there is any residual adhesive making removal challenging. Be patient and avoid using excessive force, as this can cause cracks or damage to the screen.
Dealing with Stubborn or Broken Protectors
Addressing Stubborn Protectors
Sometimes, screen protectors can be stubborn and difficult to remove. If you encounter resistance, try using a little heat to loosen the adhesive. Gently warm the screen using a hairdryer on a low setting, holding it a few inches away from the screen. The heat can soften the adhesive, making it easier to remove the protector. Be cautious not to overheat the screen, as excessive heat can damage the device. If the protector still doesn’t come off easily, continue using gentle prying techniques to avoid causing any damage.
Handling Broken Glass Protectors
If the glass screen protector is broken or shattered, take extra precautions during removal. Wear protective gloves to avoid any risk of cuts from sharp glass shards. Carefully lift off the larger pieces of the broken protector, using tweezers or a small tool to avoid touching the glass with your hands. Dispose of the broken pieces properly, and check the screen for any remaining fragments or adhesive. Clean the screen thoroughly before applying a new protector to ensure no debris is left behind.
Cleaning the Screen After Removal
Removing Residual Adhesive
Once the glass screen protector is removed, you may find residual adhesive on your device’s screen. Use a microfiber cloth and a small amount of cleaning solution to gently wipe away any remaining residue. Avoid using harsh chemicals or abrasive materials, as these can damage the screen. If necessary, use a bit of rubbing alcohol on the cloth to help dissolve and remove sticky residue. Ensure that all adhesive is completely removed before proceeding to apply a new screen protector or using the device.
Checking for Screen Damage
After cleaning, inspect your device’s screen for any damage that may have occurred during the removal process. Look for scratches, cracks, or any other issues that might affect the screen’s functionality. If you find any damage, consider seeking professional repair services before applying a new screen protector. Ensuring that the screen is in good condition helps in maintaining the overall quality and functionality of your device.
Applying a New Screen Protector
Preparing for New Protector Installation
With the old protector removed and the screen cleaned, you’re ready to apply a new screen protector. Follow the manufacturer’s instructions for the new protector to ensure proper application. Align the new protector with the screen and use a dust-free environment to avoid particles getting trapped underneath. Carefully apply the protector, smoothing out any bubbles or wrinkles using a plastic card or the provided application tool. Taking your time during this process ensures a smooth application and helps in maintaining the screen’s clarity and touch sensitivity.
Ensuring Proper Application
Double-check that the new screen protector is properly aligned and securely attached. Press down gently around the edges to ensure it adheres well to the screen. If there are any air bubbles, use the application tool or your fingers to push them towards the edges. Allow the protector to set and adhere completely before using the device. Proper application ensures that the protector provides maximum protection and maintains the device’s usability.
Conclusion
Removing a glass screen protector requires careful handling to avoid damage to your device’s screen. By assessing the condition of the protector, gathering the right tools, and following safe removal techniques, you can ensure a smooth and successful process. Addressing stubborn or broken protectors with extra caution and cleaning the screen thoroughly afterward are crucial steps in preparing for a new protector. With these techniques, you can safely remove your old screen protector and apply a new one, keeping your device in optimal condition.