Introduction to Solar Battery Charging
Harnessing the power of the sun to charge batteries is both eco-friendly and cost-effective. It uses solar panels to convert sunlight into electrical energy, which then charges the batteries. This DIY approach to creating a solar battery charger is straightforward, requiring only basic tools and components. Ideal for outdoor enthusiasts, hobbyists, and anyone interested in sustainable energy solutions, building your own charger is a practical project with tremendous benefits.
The process involves understanding how solar panels work, selecting the right components, and safely assembling them to build an effective charger. The allure of a DIY solar battery charger lies in its simplicity and the satisfaction of powering your devices off the grid. With a minimal investment, you can have a renewable energy source at your fingertips.
Essential Components for Your Solar Battery Charger
To begin making your solar battery charger, ensure you have all the necessary parts and tools. Here’s what you’ll need:
- A Clear, Waterproof Container: This will house your components. Look for one with an O-ring seal, like a tupperware from a dollar store.
- Battery Holder: Get a holder suitable for AA batteries. Radio Shack has them, or you can find alternatives online.
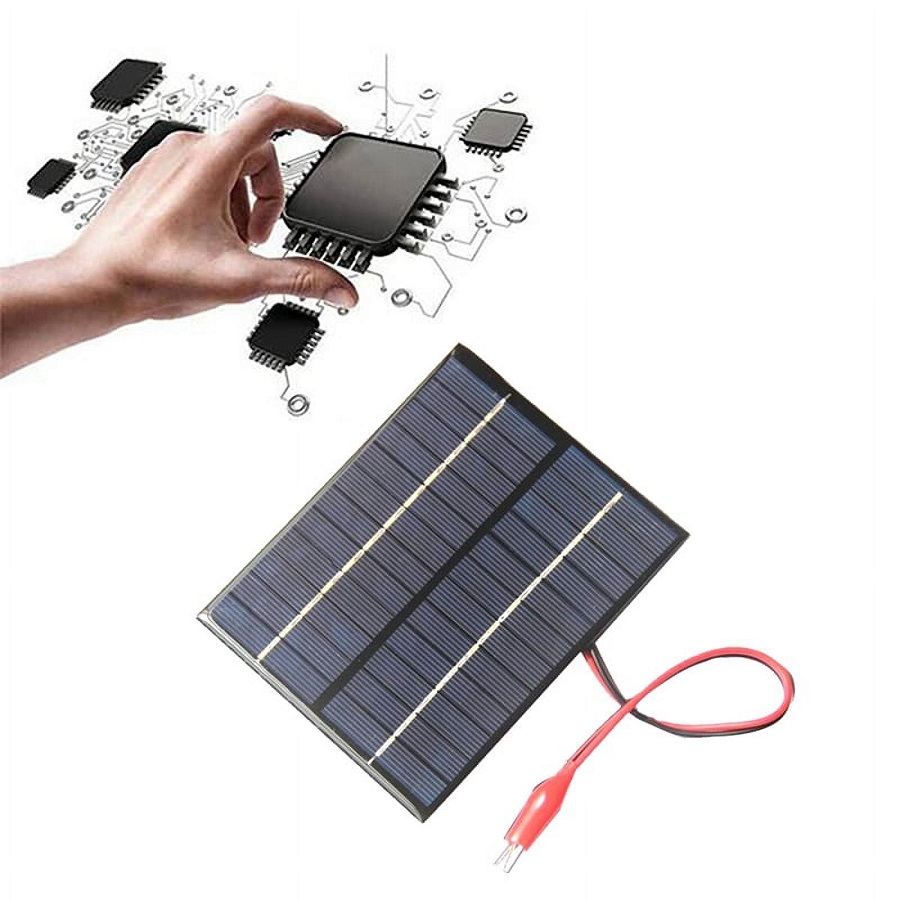
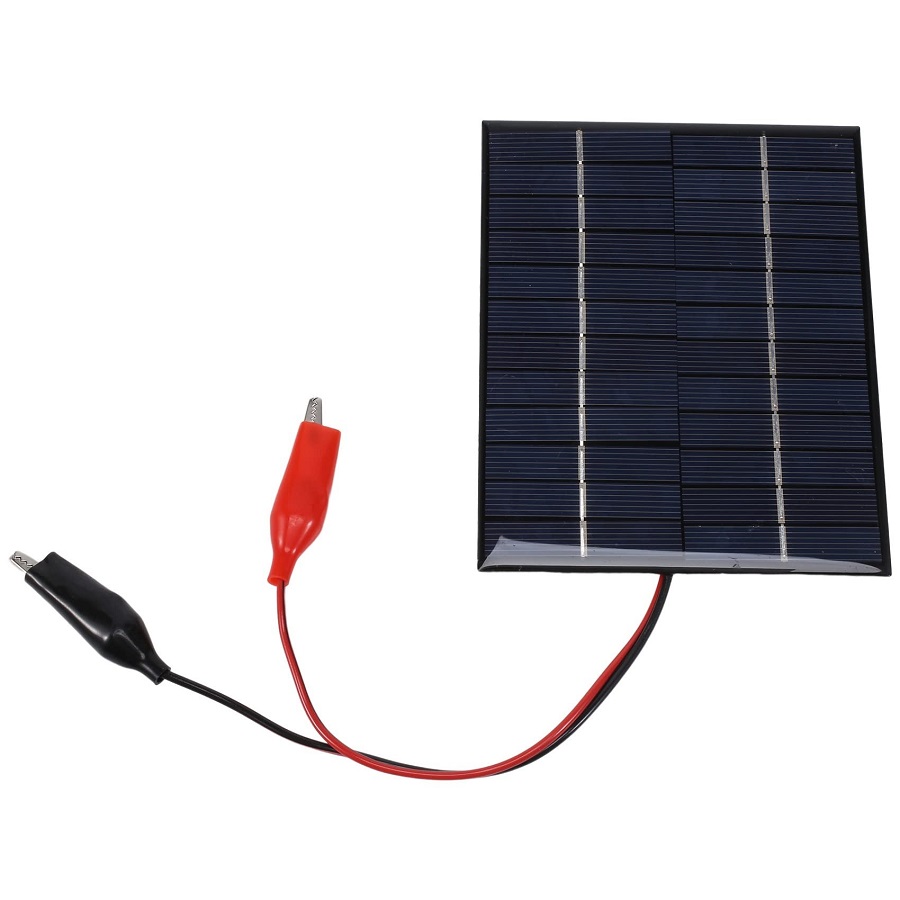
- Solar Panels: Choose panels rated at 4 volts or above to effectively charge your batteries.
- Blocking Diode: This prevents the power from flowing back into the solar panels, which could damage them.
- Soldering Iron and Solder: You’ll need these to connect your components securely.
- Tape: For insulation and securing your setup within the container.
- Safety Goggles: Protect your eyes while soldering or working with electrical components.
- Wire: To connect the solar panels to the battery holder and diode.
- Time and Patience: Set aside 20-30 minutes for the project, and approach it calmly for the best results.
The quality of these components affects the charger’s efficiency and durability, so choose wisely. Prepare to invest in a little, for a lot of power in return. Next, we’ll explore the importance of understanding solar panel ratings and battery specifications before starting the assembly process.
Understanding Solar Panel Ratings and Battery Specifications
Before diving into building your solar battery charger, it’s crucial to grasp the essentials of solar panel ratings and battery specs. Matching the panel to your battery type guarantees efficient charging and extends the life of both components.
Solar Panel Ratings
Every solar panel has a voltage and current rating, indicated in volts (V) and milliampere-hours (mA or mAh). For a DIY solar battery charger, panels rated for at least 4 volts are advisable since they can provide enough energy to charge standard AA or AAA batteries, which typically require around 1.2 volts each for charging.
Also, consider the panel’s power output, measured in watts (W). The power of a solar panel is calculated by multiplying its voltage (V) by its current (mA). Panels with a higher wattage will charge batteries faster, but remember that an energy overflow could damage the battery.
Battery Specifications
NiMh batteries are commonly used and have varying capacities, usually between 2000 – 3000 mAh. It’s important to know the voltage and capacity of your batteries. This information can often be found directly on the battery or its packaging. Understanding these specifications helps determine the number of solar panels and the time needed for charging.
To avoid harming the batteries, do not exceed a charging current of more than 10% of the battery’s capacity (C/10 rule). For example, with a 3000 mAh battery, the max charging current should be 300 mA. The right balance will ensure you recharge your batteries without the risk of overheating or damage.
By paying attention to these ratings and specifications, you set the stage for a successful assembly of your solar battery charger. In the next sections, we’ll proceed with the step-by-step process, starting with securing the solar panels correctly.
Step-by-Step Assembly Process
Once you have a solid understanding of solar panel ratings and battery specifications, and your components are ready, it’s time to start the assembly process.
Securing the Solar Panels
Begin by placing your solar panels onto the lid of your waterproof container. Make sure the panels face upward and catch sunlight well. Use tape to fix the panels in place. If they have sturdy tabs for connections, you may need to reinforce these with extra tape to prevent breakage. A snug and secure positioning of the solar panels ensures maximum sunlight absorption and consistent power supply to the charger.
Installing the Blocking Diode
Next, focus on the blocking diode. This is critical for ensuring power flows in the right direction – into the batteries, not back into the solar panels. Solder the blocking diode onto the positive wire from the battery holder. Then solder the other end to the positive tab on the solar panel. With just one solar panel, your soldering is done. However, with multiple panels, make sure the diode is installed on the positive side of the connection you plan to make with the battery holder.
Connecting the Batteries
Finally, it’s time to connect the batteries to the solar panels. Attach the wires from the battery holder to the corresponding tabs on the solar panels – positive to positive, negative to negative. If using multiple batteries, connect them in series or parallel, depending on the required voltage. Use your soldering iron to make clean attachments, ensuring a solid connection. After the batteries are connected, your solar battery charger is essentially complete.
With your solar panels secured, blocking diode installed, and batteries connected, you’re almost ready to harness the power of the sun. The following sections will provide additional tips for efficient solar charging and troubleshooting common issues, so your DIY solar battery charger operates smoothly.
Tips for Efficient Solar Charging
To maximize the performance of your homemade solar battery charger, follow these practical tips:
- Position the Solar Panels Correctly: Place the solar panels where they can get direct sunlight for most of the day. Avoid shaded areas.
- Angle for Optimal Sunlight: Adjust the angle of your solar panels throughout the day to follow the sun’s path. This will capture more energy.
- Clean the Solar Panels: Keep the panel’s surface clear of dust and debris to maintain efficient charging.
- Monitor Battery Temperature: Batteries can overheat while charging. If they’re too hot, give them a break.
- Use Quality Batteries: Invest in good NiMh batteries for better capacity and longer life.
- Check Connections Regularly: Ensure wires and solder points remain secure to prevent interruptions in charging.
- Charge During Peak Sun Hours: The sun’s energy is strongest from late morning to early afternoon. Use this time for charging.
By applying these simple yet effective strategies, you will ensure that your DIY solar battery charger performs reliably and efficiently. With care, your charger can provide you with a sustainable power source for years to come.
Troubleshooting Common Issues
When assembling your DIY solar battery charger, you may face some common issues. Here’s how to address them efficiently:
- Solar Panels Not Charging: Check for proper sunlight exposure. Verify connections are secure and not obstructed.
- Battery Not Charging: Ensure batteries are properly connected to the solar panels. Use a multimeter to test the battery voltage.
- Slow Charging: Make sure solar panels have the correct rating. Confirm that the solar panels are clean and devoid of shadows.
- Overheating Batteries: Stop charging to let batteries cool. Charge in a well-ventilated area.
- Weak Connections: Check all soldered joints. Reinforce any loose connections with additional solder and tape.
- Charger Not Working After Assembly: Review each connection step. Compare with guide instructions to troubleshoot.
Overcoming these issues is all about checking the basics and making adjustments as needed. With these tips, you can keep your solar battery charger in top condition.
Final Assembly and Testing
After carefully following the previous steps, your DIY solar battery charger is nearly ready for action. Now, it’s critical to ensure everything is set up correctly and functions as intended. This phase involves the final assembly and a thorough testing process.
Checking the Assembly
Before exposing your charger to sunlight, double-check each component. Confirm that the solar panels are firmly taped and the connections are intact. Inspect the soldering work on the blocking diode and battery holder; it should be clean and strong.
Testing in the Sun
Take your charger to a sunny spot. Connect the batteries and position the panels to receive direct sunlight. Observe if the LED indicators, if present, light up. If you don’t have indicators, use a multimeter to measure the output voltage where the wires meet the battery holder. You should detect a voltage increase if the panels are working.
Monitoring the Charging Process
Leave the batteries to charge for a few hours, then check their progress. If the batteries are warmer than usual, this might be normal during charging; however, they should not be too hot. Remember, charging takes time, especially with small panels.
Testing Under Different Conditions
To ensure reliability, test your charger on different days. Try it under clear skies and partial clouds. This will give you an idea of how it performs under varying weather conditions. Adjust the panel angles throughout the day for optimal charging.
Confirming Long-term Stability
After the initial testing, do a long-term stability check. This means leaving the charger out for several days to a week. Keep an eye on the charging efficiency and note any changes or issues that arise.
With these steps, you can validate that your homemade solar battery charger is ready for regular use. Enjoy the benefits of your eco-friendly power source, knowing you crafted it with your own hands and a modest budget.
Safety Precautions and Maintenance
When working on your DIY solar battery charger, safety comes first. Follow these simple safety tips and maintenance practices to keep your setup running safely and smoothly.
Safety Precautions
- Always wear safety goggles when soldering to protect your eyes from sparks and debris.
- Work in a well-ventilated area to avoid inhaling fumes from soldering.
- Handle the soldering iron carefully to avoid burns and never leave it unattended when it’s hot.
- Check all electrical connections thoroughly to prevent short circuits that can lead to fires.
- Keep water and other liquids away from your electrical components to prevent damage or electric shock.
Maintenance Tips
- Regularly inspect your solar panels for dirt and debris. Clean them gently with a soft cloth.
- Check the wires and connections for signs of wear or corrosion. Replace or repair if needed.
- Store your solar battery charger in a dry and cool place when not in use.
- Test your charger periodically to ensure it’s charging the batteries efficiently.
- Avoid exposing batteries to high temperatures for extended periods, as this can reduce their lifespan.
By adhering to these safety precautions and maintenance steps, you’ll extend the life of your solar battery charger and ensure it operates at peak efficiency. This low-cost and eco-friendly charger is a testament to sustainable innovation, and with proper care, it will serve you well for many solar cycles.